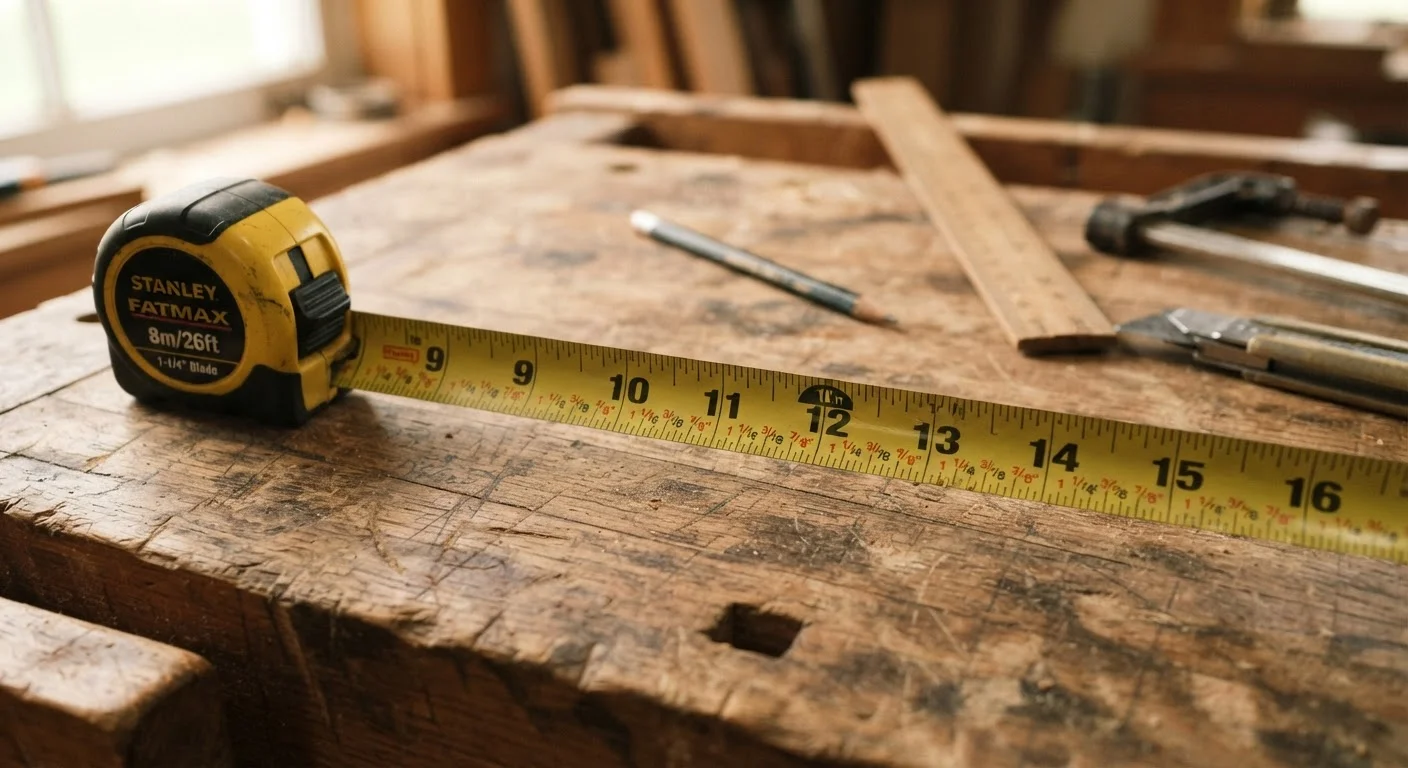
How a Tape Measure Is Laid Out
A standard American tape measure uses imperial units - feet, inches, and fractions of an inch. The blade (the metal strip that extends out) is printed with numbers that count whole inches, and between each pair of numbers sits a series of tick marks of varying heights. Those varying heights are the key to everything.
Blade
The long metal strip that extends from the tape measure case. It's printed with inch numbers and fraction tick marks.
Tick mark
A short printed line on the blade that indicates a specific fraction of an inch. Taller marks represent larger fractions.
Hook (or tang)
The L-shaped metal piece at the very end of the blade. It's designed to grip the edge of a surface so measuring can begin at true zero.
Kerf
The narrow slot a saw blade cuts through material, typically about 1/8 inch wide. Accounting for it prevents pieces from coming out slightly short.
Imperial units
The measurement system used in the United States, based on inches, feet, and yards rather than the metric system's centimeters and meters.
Along the blade you'll see inch numbers spaced about an inch apart in real distance. Every 12 inches, the number is often printed in red or in a larger font to signal a full foot. Some tapes also highlight every 16 inches in red to indicate standard stud spacing in wood-framed walls - a helpful reference when hanging shelves or installing drywall.
The metal hook at the very end of the tape looks like it might be loose or broken, but that slight movement is engineered on purpose. The hook slides in or out by the exact thickness of its metal so that whether you're hooking it onto the outside of a board or pressing it flat against a surface, the blade still reads from true zero.
Reading the Fraction Marks
Between each pair of inch numbers, most US tape measures squeeze in 15 tick marks - creating 16 equal segments. Each of those segments equals 1/16 inch. You read fractions by counting how many tick marks past the nearest lower inch mark your measurement falls, then expressing that as a fraction over 16.
The marks themselves are printed in four different heights so you can identify the fraction at a glance:
- Longest mark (besides the inch line): 1/2 inch - sits exactly halfway between two inch numbers.
- Second-longest marks: 1/4 inch and 3/4 inch - sit halfway between the inch line and the 1/2-inch line on each side.
- Medium marks: 1/8-inch increments - 1/8, 3/8, 5/8, and 7/8 inch.
- Shortest marks: 1/16-inch increments - fill in all the remaining gaps.
So if your pencil mark lands on the fourth short tick past the 7-inch line, you're looking at 7 and 4/16 inches - which simplifies to 7-1/4 inches. You don't need to do the math in your head every time; with practice, your eye learns to spot the landmark marks (half, quarter, eighth) and count from there.
A Simple Trick for Counting Fractions
Start from the nearest obvious landmark rather than from the inch line. If your measurement is just past the 3/4-inch mark, count forward in 1/16-inch increments from there instead of counting all the way from zero. It's faster and reduces counting errors.
Common Mistakes and How to Avoid Them
Even experienced DIYers make recurring tape measure errors. Knowing them in advance puts you a step ahead.
Misreading the starting point
Placing the hook incorrectly - for example, letting it float instead of seating it firmly - introduces an error right from zero. Hook it deliberately: over an edge for outside measurements, flat against a surface for inside work.
Confusing similar-length marks
The 1/8-inch marks and 1/16-inch marks look similar at a glance, especially on worn or dirty tape. Work in good light, and if you're unsure, count tick marks from the nearest obvious landmark (the 1/2-inch mark is hard to miss).
Letting the tape bow or sag
A tape that curves upward in the middle because it's measuring a long span without support will read longer than the true distance. Keep the blade flat against the surface or use a helper for measurements over 6 feet.
Writing measurements in confusing notation
Jotting "7 4" on a scrap of paper is easy to misread later. Write measurements as whole number-fraction pairs - 7-1/4" - to avoid costly miscuts. Sloppy notes are one of the shortcuts that come back to haunt you in home improvement projects.
Practical Tips for Accurate Measuring
Reading the tape correctly is only half the job - transferring that measurement accurately to your material is where projects succeed or fail.
- Mark with a sharp pencil, not a marker. A thick marker line can be 1/16 inch wide by itself, enough to throw off a tight fit.
- Measure twice, cut once. This advice is a cliché because skipping it is expensive. Double-check before committing.
- Use a square to extend your mark. A pencil line drawn freehand across a board tends to drift. A combination square or speed square keeps it perpendicular.
- Know which side of the line to cut on. The saw blade removes a small amount of material called the kerf (typically 1/8 inch). Cut on the waste side of your line, not through it.
If a project calls for multiple identical pieces, measure and cut the first one, then use it as a template for the rest rather than re-measuring each time. Accumulated small errors in repeated measuring add up quickly.
Confident measuring is foundational to almost every indoor improvement task. Whether you're trimming baseboard, installing shelves, or laying tile, the same principles apply. For guidance on deciding when to tackle a task yourself versus calling in help, see our article on DIY maintenance vs. calling a professional.